How to 3D Print in Metal with Creo and Materialise
Written by Jose Coronado, PTC, and edited by Mike Gayette.
Additive manufacturing (AM) is the process of building up layers of material to create a physical model of a digital design. It is typically associated with industrial and manufacturing applications.
The additive manufacturing industry has been somewhat fragmented in terms of vendors and standards across the different aspects of software and hardware. If you want to get the most value out of AM, it should be fully integrated into your CAD system. Otherwise, you may find yourself with file import and export issues as tedious as they are time consuming.
With Creo, you can have all the required tools needed to design for additive manufacturing up to the build preparation stage, thanks to the integration of Materialise technology in Creo’s tray assembly. You can create the right support structures based on Materialise SG+ and prepare the printer’s machine code using the Materialise build processor interface.
The Creo extension which includes these components is Additive Manufacturing Plus for Materialise.
How Do The Integrated Components Work Together?
Creo enables faster exploration of innovative design alternatives and allows you to select the most efficient manufacturing process. When additive manufacturing is the best option, you can prepare the print job without leaving Creo. For example, here is a simplified process to print in metal:
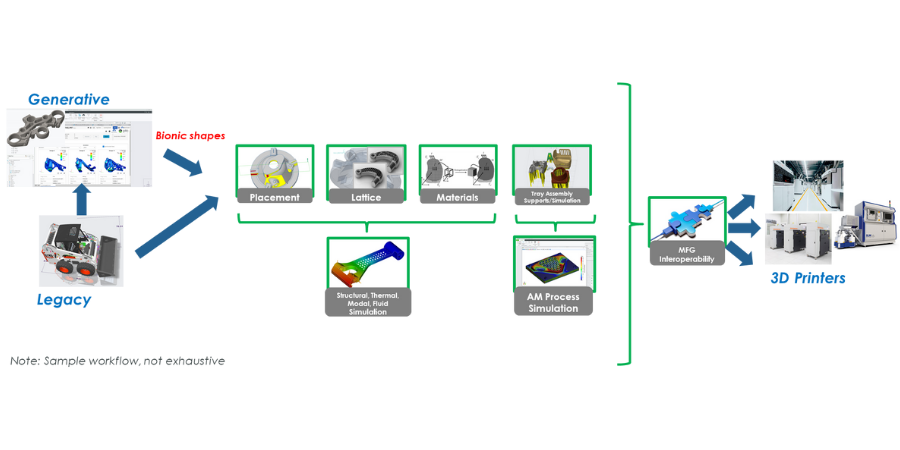
In the past, companies used several types of software to import and export files. With Creo and Materialise, this is no longer the case.
Printing a Generative Model
Here is an example of the steps taken to print a generative model:
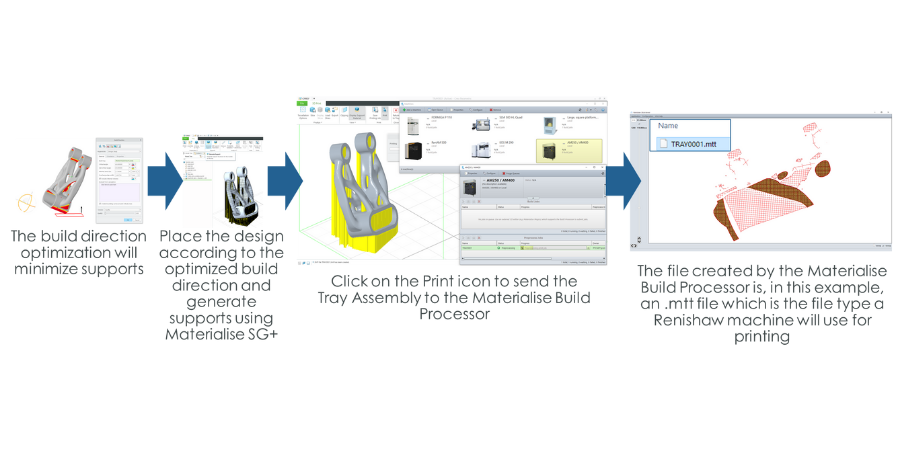
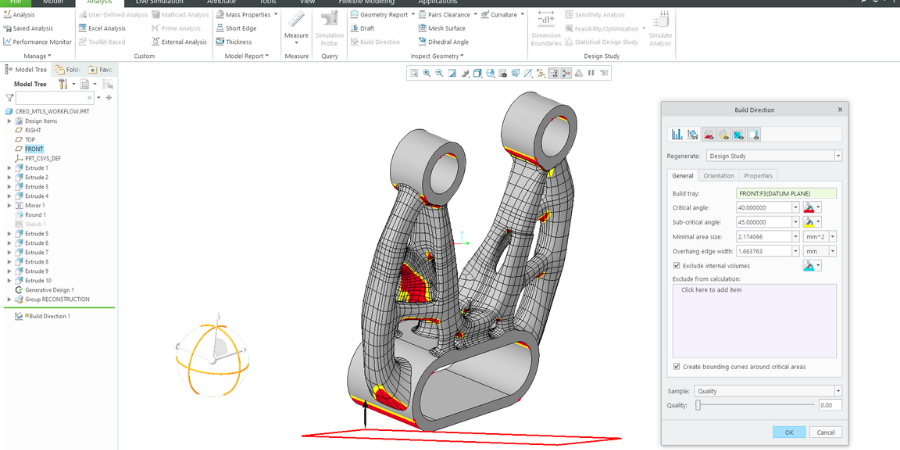
1. Set the build direction
The Build Direction optimization tool is right in Creo parts mode. It is available to design and manufacturing engineers early in the process, so you can evaluate the impact of a design decision in the context of additive manufacturing.
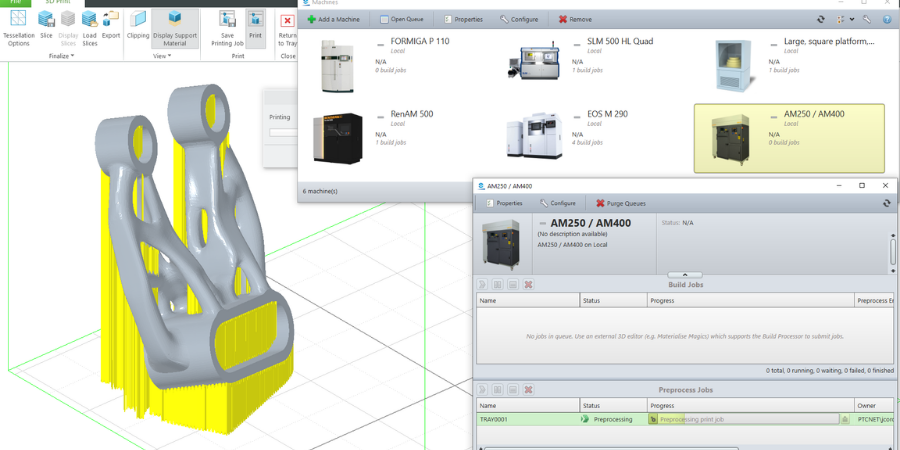
2. Generate support structures
When the design is ready, you can select which metal printer you are using for this build job. Place the 3D model in the tray assembly using the optimized build direction. Then, generate the support structures, which are generated by Materialise SG+ technology fully integrated into Creo. You will see two commands, one to edit the support structures parameters profiles and another to create such supports.
Organizations typically spend long hours defining their parameter settings and tailoring them to 3D model type, material, printer technology, and so on. When the settings are defined, they can be saved on a parameter profile to be selected and used to generate the correct support structures.
3. Send tray assembly to build processor
Once the support structures are created, the printer profiles can be assigned for each body on the model tree. For instance: supports, main body, and lattices. Then you can adjust the tessellation parameters and click the print command.
It’s in this step that the 3MF file is created in the background and sent to the Materialise build processor. The 3MF file format was selected because it provides the reliability, completeness, and unambiguity required to automate the information transfer between Creo and the build processors.

Once the build processor finishes, we can visualize each layer of the print job. The above example used the Renishaw build processor. The file created by the build processor is an .mtt, which contains the machine code needed for the Renishaw machine. File formats vary according to the 3D printer brand used.
Engineers are starting to leverage generative design software to explore unconsidered design options. Here’s what they’re finding out: The GE bracket redesign shown in the animation above was 75% lighter than the original design and optimized to stay within the material yield stress using generative design.
See Creo and Materialise in Action
What does it look like to prepare a 3D model to be printed in metal? See up close how the 3D model and supports might be set up and how to review the 3D printer machine code in the video below.