How to Create Lattice Features in Creo
One of the benefits of additive manufacturing is that it lets you manufacture complex shapes that would otherwise prove difficult or impossible to produce with traditional processes. Imagine sending this model to be injection molded:
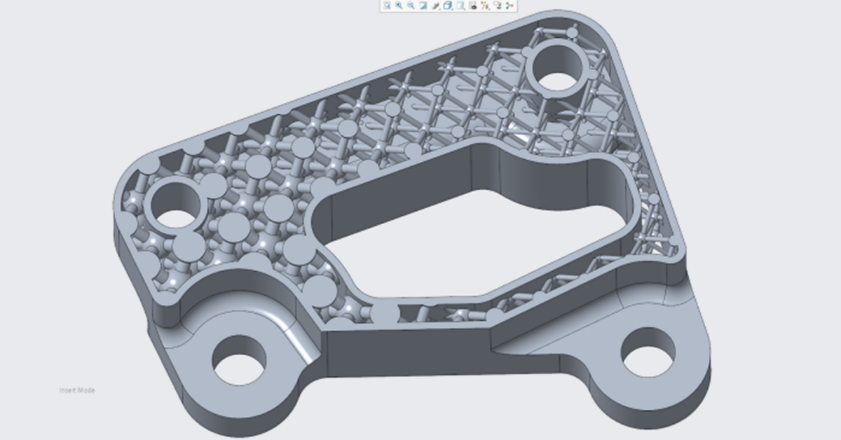
But with additive manufacturing, lattice structures like these are easy to produce. And that’s good news for engineers and designers who want to create strong parts with a fraction of the weight of a solid piece. A lattice with thick walls and small cell sizes can save weight, but still withstand large forces. For other parts, a more “airy” lattice structure can offer just the right support without adding much weight.
In short, lattice structures in the era of additive manufacturing offer powerful new design options for product developers.
That’s why, in Creo 4.0, we introduced support for lattices. Now you can design, optimize, and validate these intricate structures, all from within your 3D CAD software.
Here’s what you need to know to get started building lattice features:
Generating a 2.5D Lattice
The first type of lattice you’ll want to use in Creo 4.0 is a 2.5D lattice. To create a 2.5D lattice, follow these steps:
- On the Model tab, click Engineering and then select Lattice.
- For the Lattice Type, select 2.5D.
- Click References.
- Click Select Items, and then select the references that enclose the volume. You can use any method to select a closed volume.

Selecting a closed volume.
- Click Cell and select a Cell Shape. You can select from triangular, square, hexagonal, and octagonal.
- Modify the cell size and other parameters, like wall thickness, in the Cell dialog.
- Set a modifier—Width, Length, or Spacing—to change the size of the lattice.
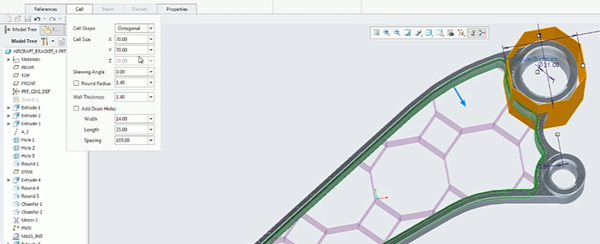
An octagonal 2.5D lattice.
Generating a 3D Lattice
The second cell type you can see in Creo 4.0 is the 3D lattice.
Like the 2.5D lattice, you can select triangular, square, hexagonal, or octagonal types. However, the 3D lattice structure is based on beams. To create a 3D lattice, follow these steps:
- On the Model tab, click Engineering and then select Lattice.
- Select 3D for the Lattice Type.
- Click References.
- Click Cell and select a Cell Shape. You can select from triangular, square, hexagonal, and octagonal.
- In the Cell dialog, modify the cell size and other parameters, like wall thickness,.
- Click Beam and define the following:
- Cross Section Type: Circular, square, or hexagonal.
- Cross Section Size: The diameter of the beam and the ball diameter will be the connections between beams.
- Profile Type
- Parabolic Radius
- Profile Coefficient
- Ball Diameter: Diameter of the ball where beams intersect.

A 3D lattice made of beams.
Watch the Demo
You can see a brief demo of these tips in the video below.
To learn more, visit the PTC Creo Help Center page.
The Best of Creo
You'll find Creo 4.0 packed with breakthrough capabilities—on top of hundreds of core enhancements. Download The Best of Creo 4 today to make sure you discover “best of the best,” then link to some quick “how-to” articles and videos, so you can make the most of Creo 4.0 and start designing smarter.